
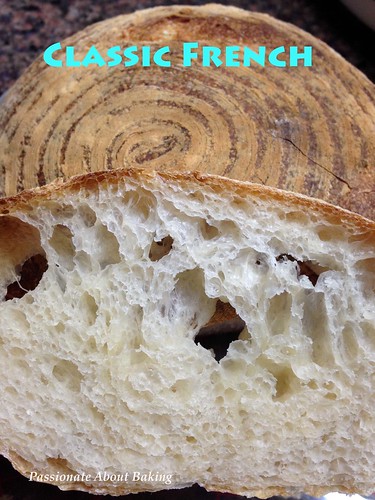
Recipe for Classic French Bread, adapted from "artisan breads every day" by Peter Reinhart.
(Makes 2 large loaves or 4 small loaves. I made 3 loaves)
Ingredients:
480g Bread flour (original uses 680g bread flour)
200g Plain flour
7g Instant yeast
14g Salt
454g Cold water (original uses warm water)Method:
- Combine all of the ingredients in a mixing bowl. Use the paddle attachment and mix on the lowest speed for 1 minute. The dough should form a coarse shaggy ball. Let it rest, uncovered, for 5 mins.
- Switch to the dough hook and mix on medium-low speed for 2 minutes. The dough should be smooth, supple and tacky, but not sticky.
- Cover the bowl with plastic wrap, then immediately refrigerate overnight or up to 4 days. [I divided the dough into half - one refrigerate and the other to bake the same day.]
- Same day bake: Do two sets of stretch and fold with 40mins resting time. After the second stretch and fold, rest for 15mins.
- Carefully transferred the dough onto a worktop. Divide the dough into two.
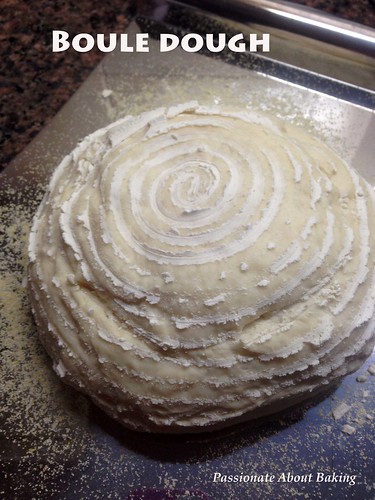
- Shape the dough round and placed it in a floured banetton.
- Let it proof at room temperature for 1 hour or when increased to 1 1/2 times its original size.
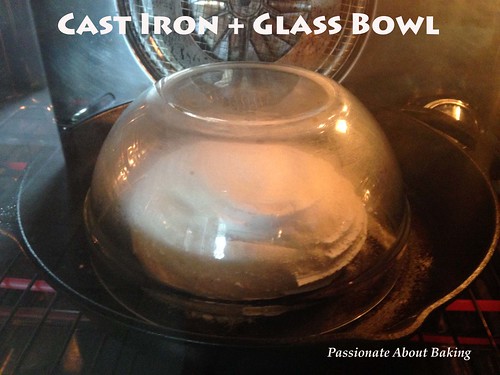
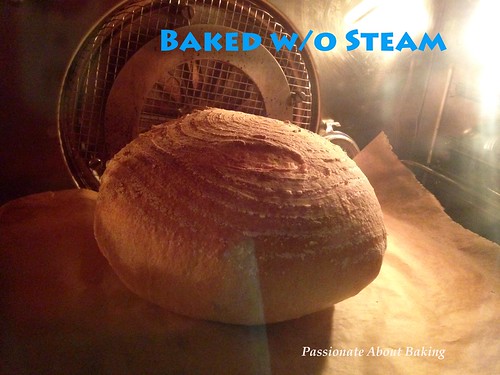
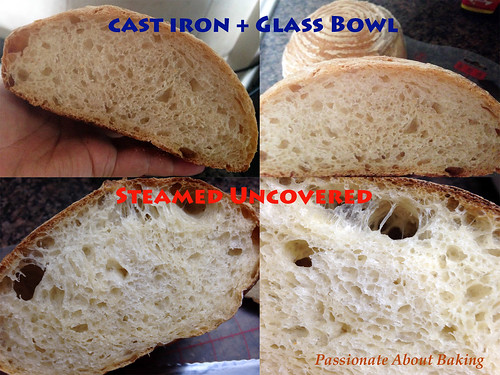
- Preheat oven to 230C with cast iron pan.
- Prior to baking, transfer the dough into a floured peel. Score the dough with a lame.
- Remove the cast iron pan from the oven. Transfer the dough to the pan. Cover it with a stainless steel bowl or a glass bowl.
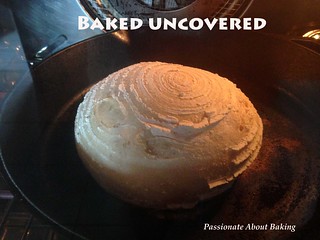
- Bake for at 220C for 15mins covered, remove the glass bowl and rotate the pan, then continue baking for another 10-12mins uncovered.
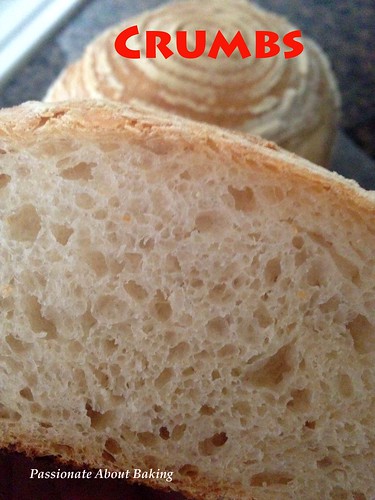
- Remove from the oven immediately and let it cool completely before slicing.
- 4th day bake: Remove the dough from the refrigerator about 2 hours before you plan to bake. Gently transfer it to a lightly floured work surface, taking care to degas it as little as possible.
- Shape the dough round and placed it in a floured banetton.
- Let it proof at room temperature for 1 hour or when increased to 1 1/2 times its original size.
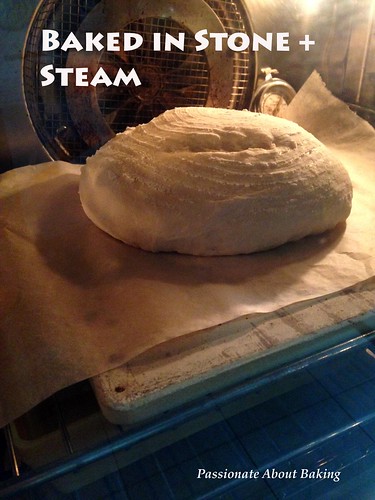
- Preheat oven to 230C with a baking stone. After 10mins, placed a pan of water into the oven and let it boil.
- Prior to baking, transfer the dough into a floured peel. Score the dough with a lame.
- Transfer the dough to the baking stone. Bake at 220 with steam for 15mins. After 15mins, remove the pan with water. Rotate the pan and continue baking for 10-12mins.
- For a crispier crust, turn off the oven and leave the bread in for another 5 mins before removing.
- Cool the bread on a wire rack for at least 45mins or completely before slicing.


1 comments:
Can you suggest a baking stone that won't crack or break when water hits it hot when steaming the bread. My son gave me two nice looking stones that he paid around $75 each that came with a big notice not to get water on them when they are hot as they will crack. That makes them sort of useless. I called the company to ask about wrapping the stone in foil or covering with parchment as you use by the picture. the answer was they didn't know if that would protect the stone or not but would advise against it. I heat the oven to 500 deg. and spray the complete inside before putting the bread in. Obviously, I can't do that with these stones. Please let me know if you answer this. Thanks, Curt tarheel1110@gmail.com
Post a Comment
Be free with your mind!